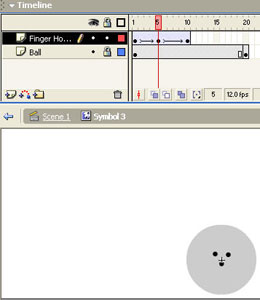
Flash: Penquin Bowling

Part IV: Making The Ball Roll

Part 1

Part 2

Part 3

Marking Rubric For This Assignment

TOTAL MARKS = 20


To make the ball look as if it is "rolling"(ball on the right), and not "sliding"(ball on the left), across the snow you will create a "movie within a movie."

That is the bowling ball will be a "movie clip" with 3 finger holes that move up and over the ball. This gives the illusion of the ball rolling. The holes also get bigger towards the middle of the ball. This gives the ball a 3D illusion. The bigger holes suggest they are closer, so that the ball seems "fatter" in the middle.

The "rolling ball" movie clip is then moved across the snow.

NB. YOU WILL ONLY SEE THE COMBINED EFFECT OF THE MOVING "ROLLING BALL" WHEN YOU "TEST THE MOVIE."

Make Bowling Ball Roll Instructional Movie

Make Bowling Ball Disappear Over Ice Instructional Movie


1) Convert the "bowling ball" into a movie clip.
  • Remove the existing "motion tween" from the "bowling ball" layer.
  • Select the bowling ball and convert it to a "movie clip."
    • Insert/ Convert to Symbol.
      • select "movie clip."
2) "Open up" the "movie clip" and extend the timeline to Frame 20.
  • Double Click on the "movie clip."
    • Make sure you are looking at the timeline for the movie clip within "Scene 1"
      • Note display at right.
  • Add a Key Frame to Frame 20.
    • Right click on Frame 20
      • Insert Key Frame
3) Add a layer to the movie clip and create the "finger holes" in the middle of the bowling ball.
  • "Lock" the "ball" layer.
  • Make sure you are working on the Movie clip time line.
    • Add a layer to the timeline.
      • Label the original timeline "ball" and the new layer "finger holes."
        • Double click on "layer label."
    • Create the 3 finger holes, and group them together.
      • Select the 3 finger holes.
        • Modify/ Group

4) Create Key Frames in Frame 5 and Frame 10 of the "finger holes" layer.

5) Create "motion tween" for "finger holes" layer, and move "holes" to top and bottom of bowling ball.

  • Create Motion Tween
    • Select "holes" in Frame 1.
      • move holes to bottom of bowling ball.
      • transform holes to "5%."
        • Window/ Transform
    • Select "holes" in Frame 10.
      • move holes to top of bowling ball.
      • transform holes to "5%."
        • Window/ Transform.

6) Move back to "main timeline" and make sure you are using the "bowling ball movie clip" on all frames of the "bowling ball" layer.

Resave and "Test Your Movie."

  • Click on "Scene 1" below timeline to move back to "main timeline."